When and How to Repot Your Houseplants
Repotting is a fundamental aspect of indoor plant care that involves transferring a plant from its current container to a new one, often with fresh soil. This practice is typically undertaken when a plant outgrows its pot, when the soil has degraded, or when roots show signs of distress. Understanding the appropriate timing and method can support the plant’s overall health and growth. In this article, we will explore how to identify when repotting is necessary and provide a step-by-step approach to ensure a smooth transition for your houseplants.
While repotting can be beneficial, it is not without its risks. The process can shock a plant if not done correctly, and the outcome depends on various factors such as the plant species, its current condition, and the environment. Therefore, it is important to approach repotting with careful observation and preparation. The information presented here is intended to guide you through the process, but individual results may vary. Always consider the specific needs of your plant and adjust your approach accordingly.
Before diving into the steps, it is helpful to understand the signs that indicate a plant may need repotting. These signs can include visible roots growing through drainage holes, slowed growth, or soil that dries out too quickly. By recognizing these cues, you can make an informed decision about when to repot. In the following sections, we will discuss the indicators for repotting, the materials you may need, and the step-by-step procedure to help your plant thrive in its new home.
Recognizing When Your Houseplant Needs Repotting
One of the primary indicators that a houseplant may require repotting is root growth that has filled the container. When roots become tightly packed and begin to circle the inside of the pot, the plant is often considered root-bound. This condition can restrict the plant’s ability to absorb water and nutrients, potentially leading to stunted growth. You can check for root congestion by gently removing the plant from its pot and inspecting the root ball. If roots are densely wound around the perimeter, it may be time to repot.
Another sign is the condition of the soil. Over time, soil can break down, becoming compacted and losing its ability to drain properly. This can result in water pooling on the surface or running straight through the pot without being absorbed. Additionally, if the soil appears crusty or has white deposits on the surface, it may indicate a buildup of salts from fertilizers. In such cases, refreshing the soil through repotting can help restore a healthy growing medium.
Visible cues above the soil line can also signal the need for repotting. For instance, if you notice roots emerging from the drainage holes at the bottom of the pot, it is a clear sign that the plant has outgrown its current space. Similarly, if the plant’s growth has slowed despite adequate light and water, or if it wilts shortly after watering, the root system may be struggling. By paying attention to these signs, you can determine the right time to repot and avoid unnecessary stress on the plant.
It is important to note that not all plants require frequent repotting. Some species prefer to be slightly root-bound and may only need repotting every few years. Always research the specific needs of your plant before deciding to repot.
Choosing the Right Pot and Soil Mix
Selecting an appropriate pot is crucial for a successful repotting. The new container should be only slightly larger than the previous one—typically one to two inches wider in diameter. A pot that is too large can hold excess soil that retains moisture, potentially leading to root rot. Ensure the new pot has drainage holes to allow excess water to escape. Materials such as terracotta, ceramic, or plastic are common choices, each with its own characteristics regarding moisture retention and weight.
The soil mix you choose should be tailored to the specific needs of your plant. Most houseplants thrive in a well-draining mix that includes ingredients like peat moss, perlite, and pine bark. For succulents and cacti, a sandy, fast-draining mix is preferable. You can purchase pre-mixed soils or create your own blend. GreenLeaf Botanicals offers a range of soil amendments that can help you customize the mix to your plant’s requirements. Regardless of the source, ensure the soil is fresh and free from pests or diseases.
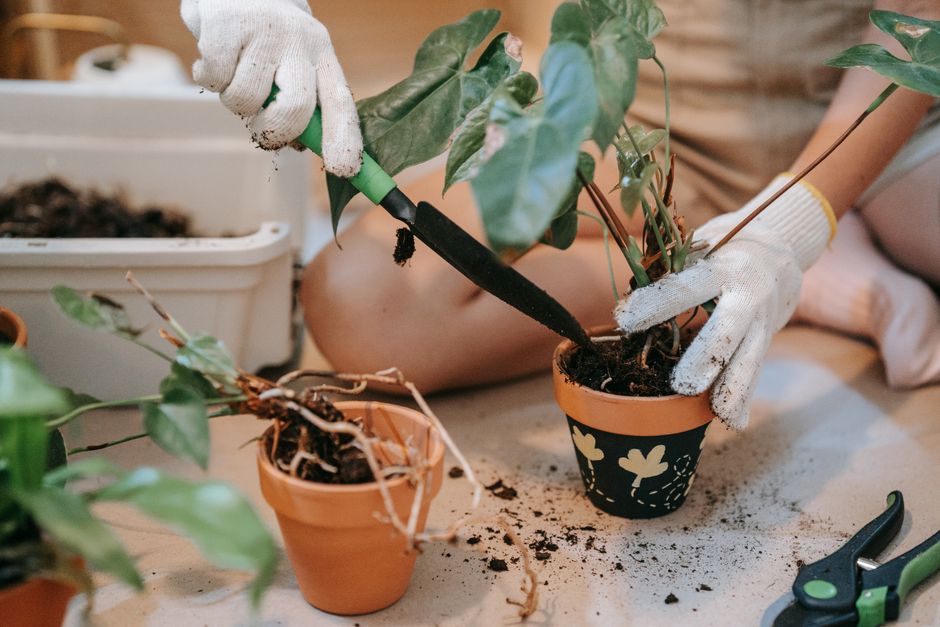
Before repotting, gather all necessary materials, including the new pot, fresh soil, a trowel, pruning shears, and gloves. It is also helpful to have a workspace covered with newspaper or a tarp to contain mess. Water the plant thoroughly a day before repotting to help the root ball hold together and reduce stress. By preparing ahead, you can make the process smoother for both you and your plant.
Step-by-Step Repotting Process
Begin by gently removing the plant from its current pot. Turn the pot sideways and support the plant’s base while tapping the bottom to loosen the root ball. If the plant is stuck, you can run a knife around the inside edge of the pot to separate the roots from the sides. Avoid pulling the plant by its stems, as this can cause damage. Once removed, inspect the root system carefully.
If roots are tightly coiled, use your fingers or a clean, sharp tool to gently loosen them. You can trim any dead or rotting roots with sterilized pruning shears, cutting just above the damaged area. This step encourages new root growth and helps prevent disease. However, be cautious not to over-prune, as this can stress the plant. After loosening or trimming, set the plant aside while you prepare the new pot.
Place a layer of fresh soil at the bottom of the new pot, creating a mound in the center. Position the plant so that the top of the root ball sits about an inch below the rim of the pot. This allows room for watering without overflow. Gradually fill around the roots with soil, gently firming it down to eliminate air pockets. Avoid packing the soil too tightly, as this can hinder drainage and root expansion.
Once the plant is situated, water it thoroughly until water runs out of the drainage holes. This helps settle the soil and provides immediate moisture. If the soil settles significantly, add more to bring it to the desired level. After watering, place the plant in a location with indirect light and moderate temperature, away from direct sun and drafts. Monitor the plant closely for the first few weeks, as it may show signs of transplant shock, such as wilting or yellowing leaves.
Post-Repotting Care and Observation
After repotting, your plant will need time to adjust to its new environment. During this period, it is common for the plant to exhibit some stress responses. These can include drooping leaves, slowed growth, or a temporary halt in flowering. Such reactions are typically temporary and should subside as the plant establishes itself. Provide consistent care, but avoid overwatering, as the roots are more susceptible to rot in fresh soil.
Maintain a regular watering schedule based on the plant’s needs, checking the soil moisture before each watering. For most houseplants, it is better to underwater slightly than to overwater. Additionally, refrain from fertilizing immediately after repotting, as the fresh soil often contains enough nutrients. Wait at least a month before applying a diluted fertilizer if needed. Keep an eye out for pests or diseases, which can sometimes appear when a plant is stressed.
Observe your plant’s progress over the following weeks. New growth, such as fresh leaves or shoots, is a positive sign that the plant has acclimated. If problems persist, such as severe wilting or root rot, you may need to reassess the soil mix, pot size, or watering routine. Remember that repotting is just one aspect of indoor plant care, and factors like light, humidity, and temperature also play significant roles in plant health.
Common Mistakes to Avoid When Repotting
One frequent error is repotting at the wrong time of year. While houseplants can be repotted whenever they are actively growing, the ideal period is typically in spring or early summer. Repotting during dormancy or in the middle of a heatwave can increase stress. Another mistake is choosing a pot that is too large, which can lead to waterlogged soil and root rot. Always opt for a modest size increase.
Over-pruning roots is another pitfall. While it is important to remove dead or circling roots, cutting too many healthy roots can weaken the plant. Similarly, using old or contaminated soil can introduce pests and diseases. Always use fresh, sterile potting mix. Lastly, failing to water properly after repotting can leave the plant in shock. Water thoroughly to settle the soil and hydrate the roots.
By being mindful of these common mistakes, you can improve the chances of a successful repotting. Each plant is unique, and what works for one may not work for another. Tailor your approach based on the specific species and its condition. With careful observation and patience, repotting can be a rewarding part of your plant care routine, helping your houseplants thrive for years to come.